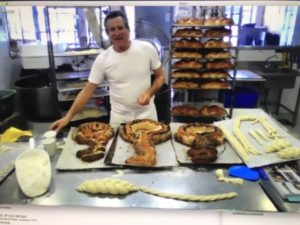
Travel and lifestyle writers divide their time between onsite visits and writing. Stay at Home orders obviously prohibit leaving one’s home except for essential activities. With excess time available, I am participating in a plethora of webinars. Some are offered by writing colleagues while others satisfy my desire to simply learn more.
Early Friday morning, I reserved a spot for the Key to Success Challah workshop being presented by the Jewish Food Society (JFS). My Zoom feed connected to Uri Scheft, a master baker in Tel Aviv along with moderators (Arielle Nir, Naama Shefi, and Amanda Dell) from JFS. He graciously shared his challah recipe and directions for making a key-shaped bread sprinkled with seeds, also known as shlissel, with an international online audience. The word shlissel is the Yiddish word for a key.
Uri Scheft is the author of Breaking Breads: A New World of Israeli Baking–Flatbreads, Stuffed Breads, Challah, Cookies, and the Legendary Chocolate Babka. His baking can be tasted at Breads Bakery in New York City and Lehamim Bakery in Tel Aviv.
After several of his Israeli customers requested this unique bread, Scheft started shaping key-shaped challot once a year. According to Scheft, Ashkenazi Jews have traditionally eaten this special challah on the first Shabbat after Passover to promote good fortune and prosperity. An online search offered additional facts and other explanations for the origin of this custom.
This was my first encounter with this tradition. Interestingly, some followers of the tradition imprint an actual key into the dough, while others bake the dough with a key inside, some create the key design from many challah rolls connected together, and another group of bakers sprinkles the poppy seeds in the shape of a key.
I have to admit that I was a bit apprehensive about taking an online food demonstration class. Part of the fun of doing anything related to food is the joy of tasting the end product. In this case, I would have to wait until later in the day to try what I learned. Here is a link to the recipe for the challah.
Fortunately, the camera captured the key elements of the preparation. The moderators fielded questions from the worldwide audience and continually asked Scheft for further explanations. After an hour of watching, I was ready to try another challah making method.
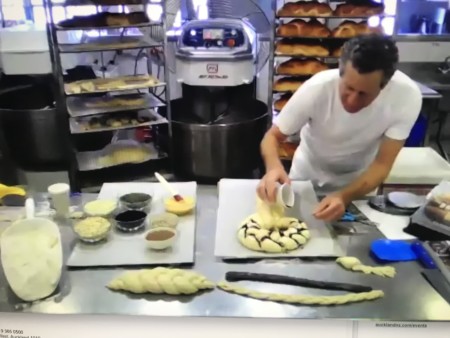
I took several photos during the presentation which provided visual clues.
My Kitchen Aid mixer would be my best friend during my preparation. I was impressed with his dedication and passion for making bread the old fashion way. I also learned helpful tips.
13 Challah Baking Tips from a Master Baker
- Sifting the flour 2x for an airier bread
- Use all-purpose flour or cake flour instead of bread flour. (Unfortunately, an explanation for this preference was not provided).
- Kneading is complete when the dough is no longer shiny or crumbly
- A lengthy kneading process creates more elasticity, develops the gluten, and helps the yeast rise.
- To check elasticity, do a window test. Stretch a small piece of dough and see if you can see through it.
- 1st rising is complete when the dough has risen 60-70% of the original size
- Exact times for rising will vary due to numerous variables. If the bread hasn’t risen within 2 hours, something is wrong with the yeast.
- Electric mixing should start at a low speed for approximately 4 minutes and then followed by an additional 5 minutes at moderate speed. This should complete the kneading process.
- When rolling the coils for the braiding, taper the ends like a cigar to make it easier to connect the ends of the braid.
- Put the brush for the egg wash in hot water so it will work better
- Decorate the crevices of the challah braid with seeds-poppy, sesame, sunflower, pumpkin, etc.
- Be mindful of over proofing. Use a fingerprint test. If a fingerprint remains and the dough doesn’t bounce back, the dough should be baked as soon as possible.
- Imagination is part of the decorating process.
Look at the length of the coils for the three braids. They are super long and narrow.
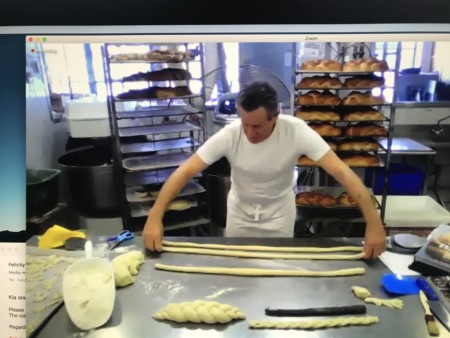
After Schleft braided the challah, he formed it into the shape of a key.
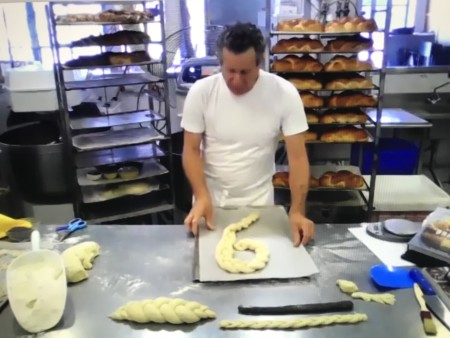
Scheft shared an alternative way to use three coils. Instead of braiding, he simply twisted the three ropes of dough together.
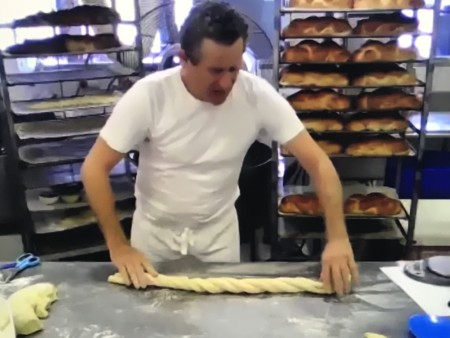
The shlissel challah can be decorated in an unlimited number of ways. Scheft shared a few examples.
In the afternoon, I used Scheft’s recipe and followed his suggestions. I kneaded the dough for longer than I have in the past and was careful not to let it rise too much. I added seeds to the crevices and an extra braid on top.
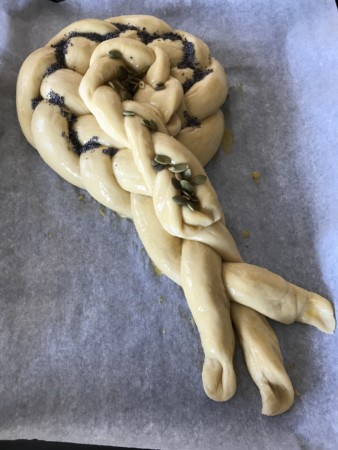
I waited patiently for the challah to bake for 25 minutes. This is what I served with our Shabbat dinner.
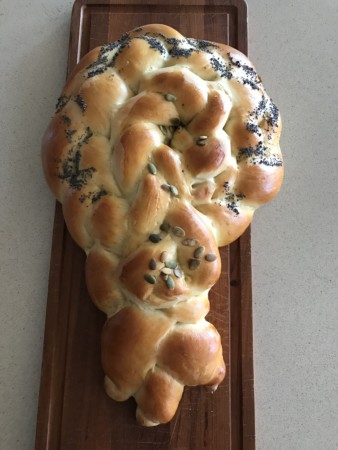
Thanks to this Jewish Food Society webinar and Scheft’s expertise, I learned a morsel of Jewish history and ended up making a delicious and creative shlissel challah for the Shabbat after Passover.
BIO
When Sandy isn’t trekking or writing in the Colorado Rockies, she is traveling. She has visited more than 40 countries and lived as an international teacher in Bangalore, India. Sandy shares her lifestyle and travel experiences with international and domestic online sites and print media.
Her stories have appeared in Hemispheres, Destinations Magazine, KUHL’s Born in the Mountain blog, Grand Magazine, Wandering Educators, Golden Living, One Travel, Miles Away, Canadian Jewish News, Getting On Travel, Far and Wide, Colorado Parent, Traveler Confidential, Family Circle- Momster, and others.
Sandy’s award-winning book, May This Be the Best Year of Your Life, is a resource for people contemplating an expat lifestyle and living outside their comfort zone. To learn more about Sandy’s travel adventures, visit https://thetravelingbornsteins.com/
Connect with Sandra